
W1209 Digital Temperature Controller Thermostat Module
W1209 Digital Temperature Controller Thermostat Module
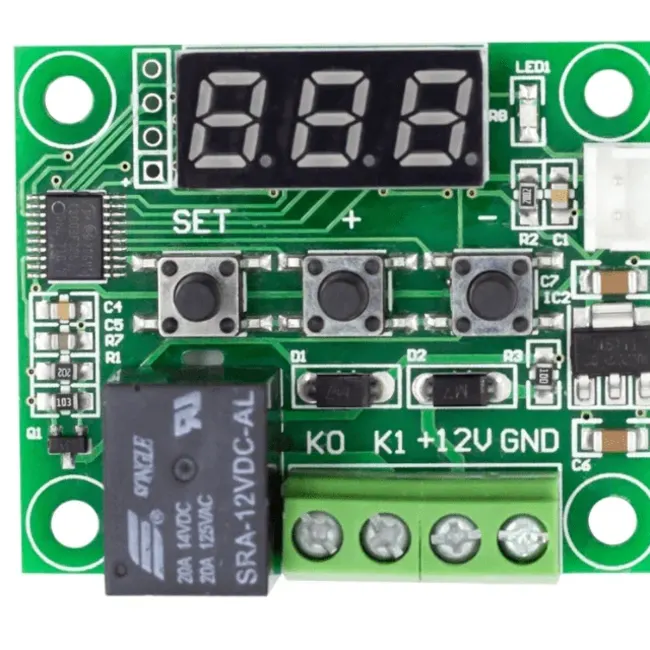
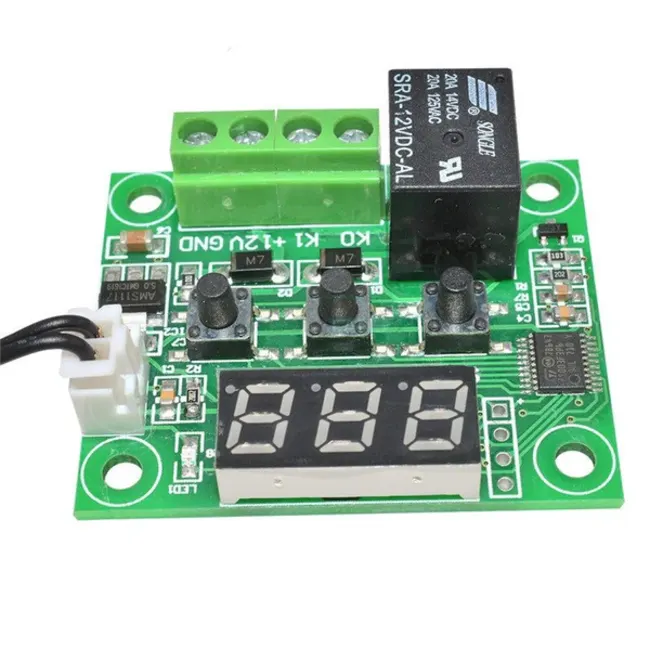
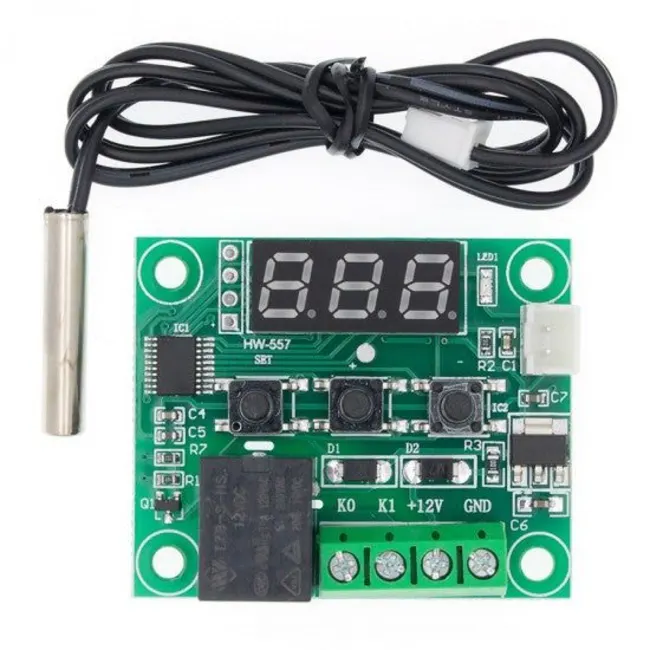
The 12V W1209 Digital Temperature Controller Module With Display and NTC Temp Sensor is a low-cost and top-quality solution if you want temperature control features in your projects. This powerful 12V module is perfect for both heating and cooling jobs, giving you a massive temperature range from -50°C to 110°C with solid 0.1°C accuracy.
The w1209 temperature controller comes with a high-quality waterproof NTC temperature sensor, so you get correct readings every single time. Setting it up is easy. With its built-in display and simple buttons, you can easily set trigger temperatures without any coding knowledge.
The onboard relay can automatically switch power for both your home AC appliances and 12V DC devices. The W1209 thermostat is perfect for creating your own automatic fans, coolers, heaters, and pumps. A must-have for student projects, DIY incubators, aquariums, and other smart automation ideas.
Also, read our blog W1209 Temperature Controller Setting detailing the variety of W1209 Setting Modes.
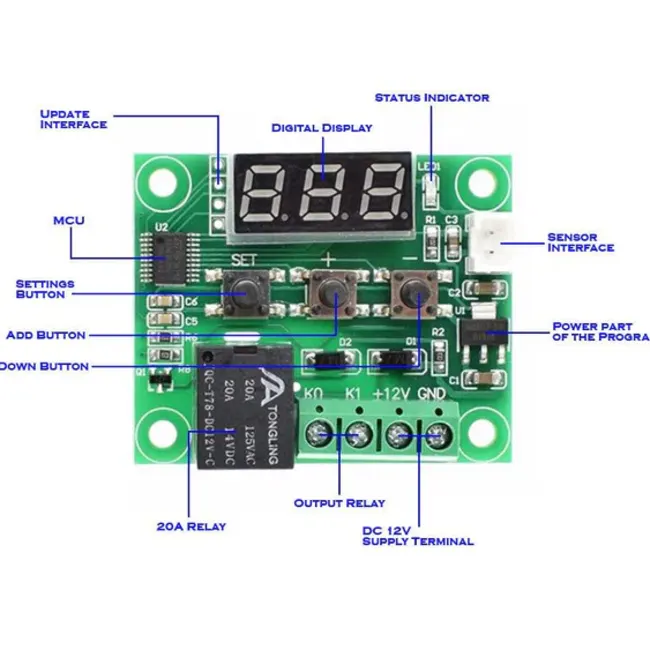
W1209 Module Diagram:

Displaying the current temperature: The Thermostat will display the current temperature in °C by default. When in any other mode making no input for approximately 5 seconds will cause the thermostat to return to this default display.
Setting the trigger temperature: To set the trick to a temperature press the button marked 'SET'. The seven-segment display will flash. You can now set a trigger temperature ( in °C) using the '+' and '-' buttons in 0.1° increments. If no buttons are pressed for approximately 2 seconds the trigger temperature will be stored and the display will return to the current temperature.
Setting the Parameters for the W1209 Digital Temperature Controller Thermostat Module :
To set any parameter, first long-press the 'SET' button for at least 5 seconds. The seven-segment display should now display 'P0'. This represents parameter P0. Pressing the '+' or '-' buttons will cycle through the various parameters ( P0 to P6).
Pressing the 'SET' button whilst any of these parameters are displayed will allow you to change the value for that parameter using the '+' and '-' buttons. When finished setting a parameter, press the set button to exit that option. If no buttons are pressed for approximately 5 seconds that thermostat will exit the perimeter options and will return to the default temperature display.
- Heating Parameter P0: P0 has two settings, C and H. As the relay energizes when the temperature is reached, the default setting C can be utilized to connect to an air conditioner. When the required temperature is found, setting H results in de energizing the relay. Any heating apparatus can be controlled by it.
- Hysteresis Parameter P1: The temperature range that must alter before a relay will change status is determined by this parameter.
- Parameter P2 (Upper Limit Temperature): P2 limits the maximum trigger temperature that can be set. It serves as a safety feature that prevents the user from setting a trigger temperature that is too high.
- Parameter P3 (Lower Limit Temperature): P3 limits the minimum trigger temperature that can be set. As a safety measure, it prevents the user from setting a low triggering temperature.
- Offset Correction Parameter P4: If there is a discrepancy between the displayed temperature and the actual temperature measurement using this parameter, changes can be made.
- Delay Parameter P5: The delay parameter P5 can be used to control how long the relay switches after the trigger temperature has been attained. It can be set for up to ten minutes at a time, in one-minute intervals.
- Alarm Parameter P6: When the temperature exceeds the specified level, this parameter causes the relay to shut off. As a warning, the display will flash "---" when an alarm condition exists. When the temperature reaches this point, the relay will not re-energize.
W1209 Setting Chart
Long press the “SET” button to activate the menu.
- Code Description Range Default Value
- P0 Heat C/H C
- P1 Backlash Set 0.1-15 2
- P2 Upper Limit 110 110
- P3 Lower Limit -50 -50
- P4 Correction -7.0 ~ 7.0 0
- P5 Delay Start Time 0-10 mins 0
- P6 High Temperature Alarm 0-110 OFF
Long pressing +- will reset all values to their default
Features:
- Temperature Control Range: -50°C to 110°C
- Measurement Accuracy: 0.1°C
- Input Voltage: 12V DC
- Output: 1 Channel Relay Output (240V AC/12V DC, 10A)
- Display: Digital display for current temperature and settings
- Controls: Three tactile switches for setting parameters and trigger temperatures
- Sensor: High-precision NTC temperature sensor
- Compact Design: Small and easy to integrate into various projects
- Applications: Suitable for incubators, temperature-controlled fans, and other temperature-regulation devices
Applications:
- To measure on-display temperature
- To turn any application ON/ OFF based on temperature reading ( both AC and DC)
- W1209 100 Egg Incubator
- Digital Temperature Controller with Waterproof Probes for Aquarium Temperature Control
- Indoor Room Temperature Control
Also check acrylic case designed for the XH-W1209 temperature controller.
Also check the XH-W1219 12V Digital Temperature Controller.
W1209 Circuit Diagram
220V AC Load Control Wiring Connection

12V DC Load Control Wiring Connection

Product Information
Product Information
Shipping & Returns
Shipping & Returns
Description
W1209 Digital Temperature Controller Thermostat Module
The 12V W1209 Digital Temperature Controller Module With Display and NTC Temp Sensor is a low-cost and top-quality solution if you want temperature control features in your projects. This powerful 12V module is perfect for both heating and cooling jobs, giving you a massive temperature range from -50°C to 110°C with solid 0.1°C accuracy.
The w1209 temperature controller comes with a high-quality waterproof NTC temperature sensor, so you get correct readings every single time. Setting it up is easy. With its built-in display and simple buttons, you can easily set trigger temperatures without any coding knowledge.
The onboard relay can automatically switch power for both your home AC appliances and 12V DC devices. The W1209 thermostat is perfect for creating your own automatic fans, coolers, heaters, and pumps. A must-have for student projects, DIY incubators, aquariums, and other smart automation ideas.
Also, read our blog W1209 Temperature Controller Setting detailing the variety of W1209 Setting Modes.
W1209 Module Diagram:
Displaying the current temperature: The Thermostat will display the current temperature in °C by default. When in any other mode making no input for approximately 5 seconds will cause the thermostat to return to this default display.
Setting the trigger temperature: To set the trick to a temperature press the button marked 'SET'. The seven-segment display will flash. You can now set a trigger temperature ( in °C) using the '+' and '-' buttons in 0.1° increments. If no buttons are pressed for approximately 2 seconds the trigger temperature will be stored and the display will return to the current temperature.
Setting the Parameters for the W1209 Digital Temperature Controller Thermostat Module :
To set any parameter, first long-press the 'SET' button for at least 5 seconds. The seven-segment display should now display 'P0'. This represents parameter P0. Pressing the '+' or '-' buttons will cycle through the various parameters ( P0 to P6).
Pressing the 'SET' button whilst any of these parameters are displayed will allow you to change the value for that parameter using the '+' and '-' buttons. When finished setting a parameter, press the set button to exit that option. If no buttons are pressed for approximately 5 seconds that thermostat will exit the perimeter options and will return to the default temperature display.
- Heating Parameter P0: P0 has two settings, C and H. As the relay energizes when the temperature is reached, the default setting C can be utilized to connect to an air conditioner. When the required temperature is found, setting H results in de energizing the relay. Any heating apparatus can be controlled by it.
- Hysteresis Parameter P1: The temperature range that must alter before a relay will change status is determined by this parameter.
- Parameter P2 (Upper Limit Temperature): P2 limits the maximum trigger temperature that can be set. It serves as a safety feature that prevents the user from setting a trigger temperature that is too high.
- Parameter P3 (Lower Limit Temperature): P3 limits the minimum trigger temperature that can be set. As a safety measure, it prevents the user from setting a low triggering temperature.
- Offset Correction Parameter P4: If there is a discrepancy between the displayed temperature and the actual temperature measurement using this parameter, changes can be made.
- Delay Parameter P5: The delay parameter P5 can be used to control how long the relay switches after the trigger temperature has been attained. It can be set for up to ten minutes at a time, in one-minute intervals.
- Alarm Parameter P6: When the temperature exceeds the specified level, this parameter causes the relay to shut off. As a warning, the display will flash "---" when an alarm condition exists. When the temperature reaches this point, the relay will not re-energize.
W1209 Setting Chart
Long press the “SET” button to activate the menu.
- Code Description Range Default Value
- P0 Heat C/H C
- P1 Backlash Set 0.1-15 2
- P2 Upper Limit 110 110
- P3 Lower Limit -50 -50
- P4 Correction -7.0 ~ 7.0 0
- P5 Delay Start Time 0-10 mins 0
- P6 High Temperature Alarm 0-110 OFF
Long pressing +- will reset all values to their default
Features:
- Temperature Control Range: -50°C to 110°C
- Measurement Accuracy: 0.1°C
- Input Voltage: 12V DC
- Output: 1 Channel Relay Output (240V AC/12V DC, 10A)
- Display: Digital display for current temperature and settings
- Controls: Three tactile switches for setting parameters and trigger temperatures
- Sensor: High-precision NTC temperature sensor
- Compact Design: Small and easy to integrate into various projects
- Applications: Suitable for incubators, temperature-controlled fans, and other temperature-regulation devices
Applications:
- To measure on-display temperature
- To turn any application ON/ OFF based on temperature reading ( both AC and DC)
- W1209 100 Egg Incubator
- Digital Temperature Controller with Waterproof Probes for Aquarium Temperature Control
- Indoor Room Temperature Control
Also check acrylic case designed for the XH-W1209 temperature controller.
Also check the XH-W1219 12V Digital Temperature Controller.
W1209 Circuit Diagram
220V AC Load Control Wiring Connection
12V DC Load Control Wiring Connection